Maxillary Anterior Seating Guide
Maxillary Anterior Seating
 |
 |
 |
 |
 |
 |
 |
 |
 |
 |
 |
 |
 |
 |
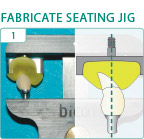
1. Using a Crown Alignment Device, mold hydroplastic resin around the abutment/crown and a threaded Crown Seating Tip to facilitate tapping in the long axis of the abutment post and implant well in order to properly engage their locking taper connection.
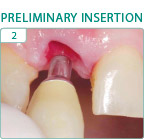
2. Seat the abutment/crown with only finger pressure for evaluation and removal of any interferences to its passive seating.
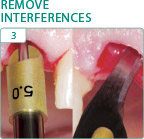
3. Remove any excessive interproximal tooth contact by adjusting the abutment/crown Remove any soft tissue or bony interferences by adjusting the abutment/crown, or by relieving or removing hard or soft tissue.
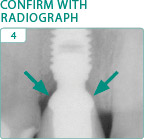
4. Confirm removal of bony interferences with a radiograph.
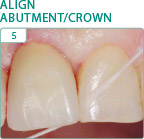
5. Align the abutment/crown prior to confirming passive interproximal contacts with dental floss, if necessary with an incisal orientation jig When in doubt, always adjust a contact that you think may be too tight, since non-passive interproximal contacts will inhibit the engagement of the abutment’s locking taper connection.
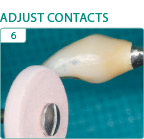
6. Adjust excessive contacts until dental floss can be passed through the contact area with only minimal resistance.
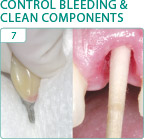
7. Eliminate or control bleeding by using a combination of vasoconstrictors, pressure and time Clean the abutment post with an alcohol wipe and implant well with an appropriately sized cotton-tipped applicator.
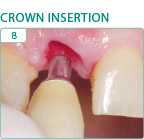
8. Insert and align abutment/crown using an incisal orientation jig when necessary
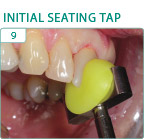
9. While digitally supporting the bridge of the patient’s nose, apply an initial seating tap using a custom seating jig on a threaded straight handle to assure that the seating forces are being directed in the long axis of the implant.
10. Confirm passive interproximal contacts with dental floss and, if necessary, remove the prosthesis by tapping on the handle of a grasping forceps to adjust any non-passive interproximal contact area Alternatively, a thin metal finishing strip may be used without having to remove the restoration.
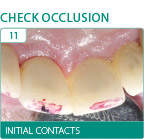
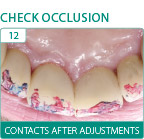
11 & 12. Establish uniform contacts initially in maximal intercuspation and then in protrusive and retrusive excursions.
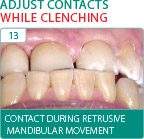
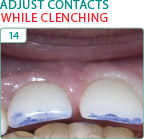
13 & 14. Establish uniformly balanced contacts while the patient is clenching in all extreme excursions including retrusive movements of the mandible from an extreme protrusive position, which may indicate the need to adjust the facial aspect of the restoration.
Notes: Markings from the retrusive movement of the mandible while clenching indicate the need to reduce the facial contour of the restorations. Note that there is no contact in maximal intercuspation.