All-Ceramic Crown: Shouldered Abutment
Page 1 | Page 2 | Page 3 | Page 4 | Page 5 | Page 6
Laboratory Technique: Abutment Level Transfer Impression and Aluminum Oxide Sleeve
 |
 |
 |
 |
 |
 |
 |
 |
 |
 |
 |
 |
 |
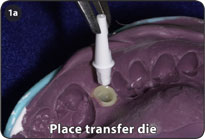
1. Orientate and fully seat the abutment transfer die (5.0mm diameter: 260-250-195, 4.0mm diameter: 260-250-194 or 3.5mm diameter: 260-250-193) into the acrylic sleeve that was withdrawn in the impression. The transfer die should fit snugly into the acrylic sleeve so that there is no gap at the interface when the transfer die is fully seated.
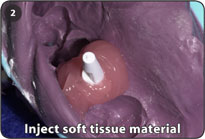
2. Inject soft tissue material (e.g. Soft Tissue Moulage by Kerr) around the abutment transfer die and acrylic sleeve up to the connection of each part. Pour a stone model and articulate the casts.
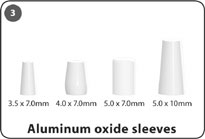
3. Select the appropriate size aluminum oxide sleeve. Each stealth shouldered abutment diameter has a corresponding aluminum oxide sleeve diameter.
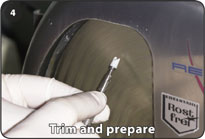
4. Trim and prepare the aluminum oxide sleeve to the desired dimensions. The sleeve must be ground wet using a sintered diamond disk or wheel.
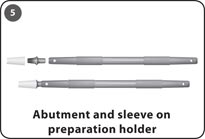
5. An efficient method of cutting the aluminum oxide sleeve is to place the sleeve onto an actual stealth shouldered abutment that is seated into an abutment preparation holder (260-101-390) and trim it using the diamond wheel of a wet model trimmer. It is recommended that the sleeve be trimmed to allow 1.5mm of occlusal space for the porcelain. Leave at least 0.5mm of sleeve above the top of the abutment to allow enough space to pack the opening of the aluminum oxide sleeve with core build up material. This will further strengthen the core providing more support for the crown. The abutment length can be adjusted up to 1.0mm if necessary.
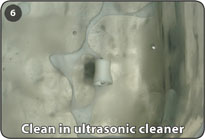
6. After the aluminum oxide sleeve has been trimmed to the desired height, clean the aluminum oxide sleeve by using either steam or distilled water in an ultrasonic cleaner for 10 minutes.
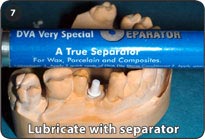
7. Lubricate the abutment transfer die with a porcelain separator and place an aluminum oxide sleeve on the lubricated transfer die.
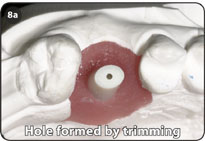
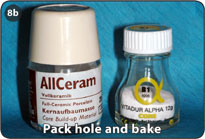
8. Use a core build up material to pack the hole formed by trimming the aluminum oxide sleeve. Bake according to the porcelain manufacturer’s specifications. A second bake may be necessary due to material shrinkage.
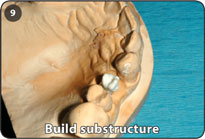
9. Build a substructure to provide support for the porcelain and bake according to the manufacturer’s specifications.
10. Apply an opaque liner, if using Allceram™ by Degussa-Ney.
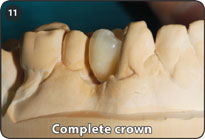
11. Use only aluminous porcelains. Follow normal layering techniques until the crown is complete.
Keys to Success
- Carefully orientate the abutment transfer die in the acrylic sleeve.
- Confirm full seating of transfer die into acrylic sleeve.
- Metal-ceramic type porcelains and pressable ceramics are NOT compatible with Bicon’s Aluminum Oxide Sleeve.
- Cerabien™ by Noritake, Vitadur Alpha by Vita and Allceram™ by Degussa-Ney are recommended for use with the Aluminum Oxide Sleeve. You may check with your porcelain manufacturer about the use of a particular porcelain with the Aluminum Oxide Sleeve.
- The expansion coefficient of the Aluminum Oxide Sleeve is:
- 25° to 500°C 7 x 10⁻⁶/C 25° to 800° 8 x 10⁻⁶/C