Integrated Abutment Crown™ (IAC): Laboratory Technique
Page 1 | Page 2 | Page 3 | Page 4 | Page 5 | Page 6 | Page 7 | Page 8 | Page 9 | Page 10 | Page 11 | Page 12
Sandblast Abutment and Apply Metal Coupler - (Part # C313)
 |
 |
 |
 |
 |
 |
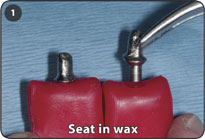
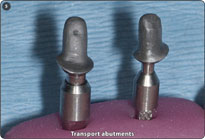
1. Place abutments in a wax base to protect the locking taper post.
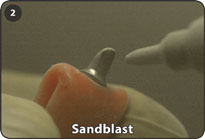
2. Micro-sandblast with 50 micron alumina oxide.
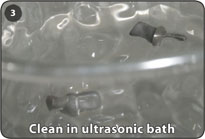
3. Clean with 95% ethyl alcohol in an ultrasonic bath for 5 minutes and allow to air dry thoroughly.
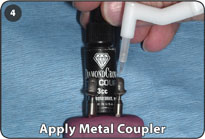
4. Place two drops of Metal Coupler (Part # C313) in a plastic well and apply 4-6 thin coats with a disposable brush.
5. Abutments should have a cloudy and milky bead-like appearance after the application of the Metal Coupler. Abutments are inserted into metal implant analogs in an acrylic base for transport to the oven.
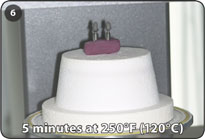
6. Air dry thoroughly. Place in oven for 5 minutes at 250˚ F (120˚C) without vacuum.
Keys to Success
- Ensure that the post is fully protected during the micro-sandblasting process.
- Alteration of the abutment post in any manner will affect the frictional fit of the locking taper resulting in a potentially non-retentive Integrated Abutment Crown.
Page 1 | Page 2 | Page 3 | Page 4 | Page 5 | Page 6 | Page 7 | Page 8 | Page 9 | Page 10 | Page 11 | Page 12