Seating of IACs or Extra-Orally Cemented Restorations
Preparation
 |
|
 |
 |
 |
 |
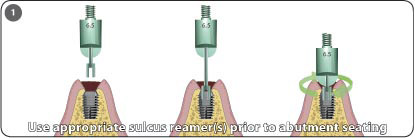
Prior to seating an abutment into the well of the implant, consider the following steps to ensure a successful restoration.
1. Insert a 2.0 or 3.0mm guide pin into the well of the implant. Assemble a threaded knob or straight handle onto a sulcus reamer. The width of the sulcus reamer should be one size larger than the diameter of the intended abutment. Slide the sulcus reamer over the guide pin and rotate while pressing it toward the alveolar crest. The rotating and pressing motion should continue until all bony and soft tissue interferences have been removed. There is a stop on the guide pin to prevent excessive bone from being removed and/or damage being done to the implant.
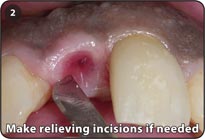
2. It may be necessary to make two oblique crestal relieving incisions that will allow the crown to displace the soft tissue while it is being seated.
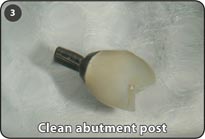
3. The Integrated Abutment Crown or extra-orally cemented crown should be steam cleaned or ultrasonically cleaned in alcohol prior to its insertion into the well of an implant to remove any contaminants.
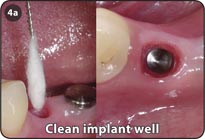
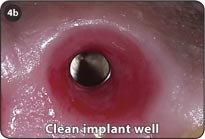
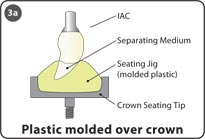
4. Clean the implant well with alcohol and cotton, if it has been contaminated with any blood or saliva for an extended period of time.
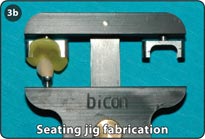
Fabrication of a Seating Jig
 |
 |
 |
 |
 |
 |
 |
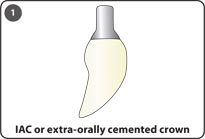
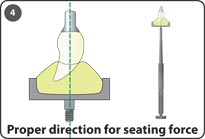
1. The use of a custom plastic seating jig, formed with a crown alignment device, is essential for maxillary anterior restorations to facilitate and to assure that the seating forces for the engagement of the locking taper connection are directed in the long axis of the implant well and abutment post.
2. Fabricate a seating jig by initially placing the post of the restoration into a crown alignment device (260-101-315).
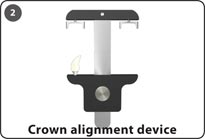
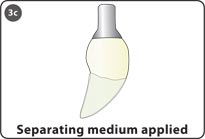
3. Thermoplastic resin is softened in a water bath at 180˚ F (82˚ C) and molded into the crown / abutment seating tip (260-101-015) within the crown alignment device. The device is closed, allowing the material to form around the incisal half of the restoration prior to its being cooled in cold water. Alternatively, methyl methacrylate may be used with a separating medium over the restoration.
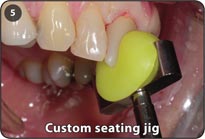
4. The newly formed plastic seating jig is used in conjunction with a crown seating tip attached to a straight handle to assure that the seating forces are directed in the long axis of both the abutment post and implant well.
5. Custom plastic seating jig within a crown seating tip attached to a straight handle.
Note: Statistically, a 2.0mm diameter abutment post will move 0.1mm into the well of an implant from its initial insertion to its being definitively seated, and a 3.0mm abutment post will move a distance of 0.25mm.
Keys to Success
- Avoid implant trajectories (especially mesial or distal trajectories) that require angled abutments.
- A caliper alignment device facilitates and assures the fabrication of a seating jig with a proper alignment trajectory.
- An orientation jig is only an initial guide for positioning of an IAC.
- Aesthetics and occlusion are the final determining factors for positioning of an IAC.
- Interproximal contacts that are too tight can prevent proper orientation and engagement of the locking taper, especially for unsplinted maxillary anterior restorations.
- While making extra-oral adjustments to an IAC, it is important to place a temporary abutment or healing abutment into the implant well to prevent soft tissue from closing the sulcus.
- The use of a straight or offset handle in conjunction with a seating jig in the abutment/crown seating tip is essential to assure proper seating of most maxillary anterior restorations.