Overdenture: Telescopic Restoration Technique
Page 1 | Page 2 | Page 3 | Page 4 | Page 5
The telescopic or sleeve overdenture restoration is an excellent alternative to the extensive cortical grafting often necessary for the treatment of atrophic alveolar ridges. Although this restoration is a removable prosthesis, the patient perceives the stability of a fixed prosthesis. The prosthesis usually requires three implants to be placed bilaterally. A combination of Bicon’s straight and solid cored angled abutments not only facilitates the fabrication of the prosthesis but also enhances the possibility for exceptional aesthetics with the telescopic restoration. The possibility for 360˚ of universal positioning of Bicon abutments makes the telescopic restoration a win-win-win situation for the dentist, laboratory technician, and the patient.
Telescopic Restoration
 |
 |
 |
 |
 |
 |
 |
 |
 |
 |
 |
 |
 |
 |
 |
 |
 |
 |
 |
 |
 |
 |
 |
 |
 |
 |
 |
 |
 |
 |
 |
 |
 |
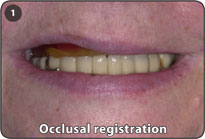
1. Record conventional occlusal records for the articulation of the dental models.
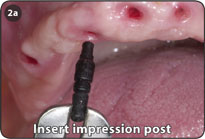
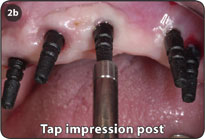
2. Use fully seated plastic or titanium impression posts or preferably actual abutments that have been tapped into the implant wells to make an implant level transfer impression.
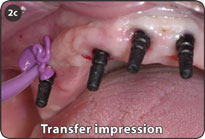
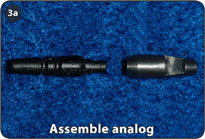
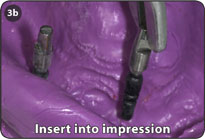
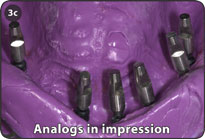
3. Remove impression posts or preferably actual abutments from their implants for their insertion into titanium implant analogs prior to being seated into the impression for the pouring of a stone model.
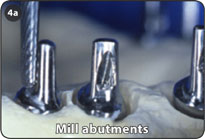
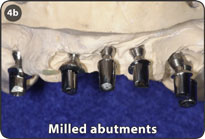
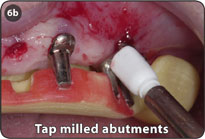
4. After the articulation of the dental models, abutments are chosen and milled to provide for parallel abutments with a 3.0mm long 2˚ cervical taper. Use bur number H356GE103023 by Comet for rough-shaping, and number H356RF103023 for finishing.
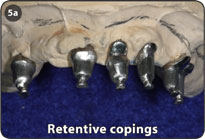
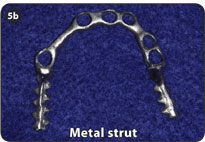
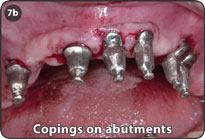
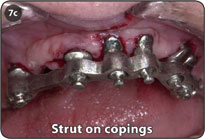
5. Individual retentive copings are fabricated on the milled abutments with a separate corresponding horseshoe shaped strut.
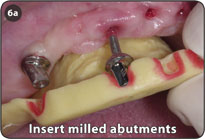
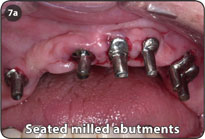
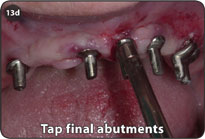
6. Milled abutments are fully seated into their implants with the aid of an acrylic
orientation jig.
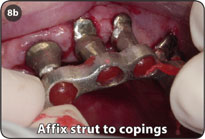
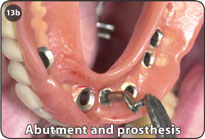
7. Individual copings are seated onto the abutments prior to the placement of the horse-shoe shaped strut.
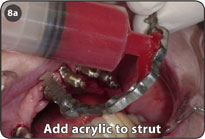
8. Individual copings are luted or fixed to the strut with resin.
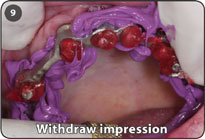
9. Impression material is injected around the abutments and horseshoe shaped strut for the making of a withdrawal transfer impression for the pouring of a new master model.
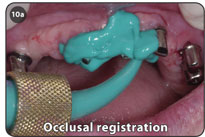
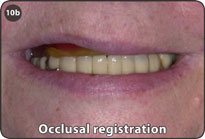
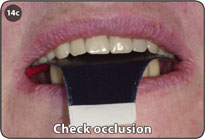
10. Confirming occlusal recordings are made by injecting impression material around the seated abutments to stabilize the occlusal registration plate.
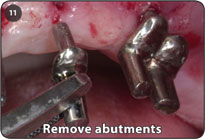
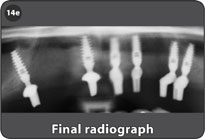
11. The milled abutments are removed and returned to the laboratory for fabrication of a new master model for the final prosthesis.
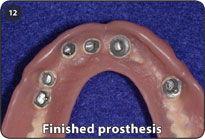
12. After soldering the copings to the horseshoe strut, they are incorporated into the processed denture.
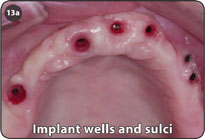
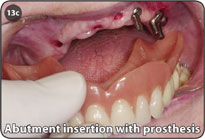
13. The milled abutments are reinserted with the aid of an acrylic seating jig and/or the final prosthesis prior to their final seating.
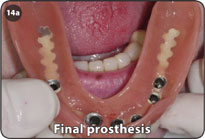
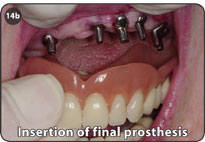
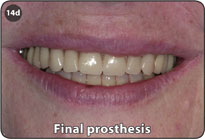
14. The removable implant supported telescopic restoration is delivered to the patient after the necessary occlusal adjustments.
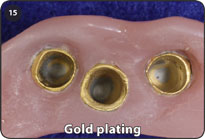
15. If the prosthesis loses retention over time, the cervical 3.0mm of the copings may be gold plated to re-establish their retention. Only gold plate the cervical 3.0mm of the copings.
Notes: The black impression posts depicted on this page are the original color of the 2.0mm plastic impression posts. The new version of the 2.0mm plastic impression post is red.
Statistically, a 2.0mm diameter abutment post will move 0.1mm into the well of an implant from its initial insertion to its being definitively seated, and a 3.0mm abutment will move 0.25mm.