Porcelain Fused to Metal: Non-Shouldered Abutment
Page 1 | Page 2 | Page 3 | Page 4 | Page 5 | Page 6 | Page 7 | Page 8
Direct Abutment Level Impression
 |
 |
 |
 |
 |
 |
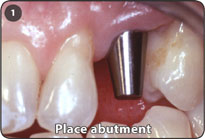
1. At the time of implant uncovering, place a non-shouldered abutment and allow the soft tissue to heal around the hemispherical base of the abutment for 6 weeks. Choose the widest non-shouldered abutment that will support the interdental papillae without encroaching upon them.
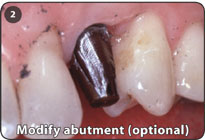
2. Use a sharp #1557 carbide bur to modify the abutment, if necessary. Use irrigation when preparing the abutments intra-orally to prevent heating and potential damage to the bone.
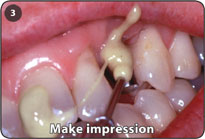
3. Make a direct impression of the modified or unmodified abutment with conventional impression materials and pour a conventional stone model. The laboratory procedures are the same as for the fabrication of crowns or fixed bridges for natural teeth. Use a knife or feathered edge margin.
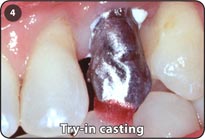
4. A try-in of the casting prior to the porcelain application is advised to assure a passive seating.
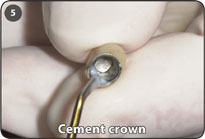
5. After any needed occlusal, interproximal, or aesthetic contouring, cement the crown conventionally with minimal cement only at the cervical aspect of the crown to avoid adverse hydraulic forces. Care must be taken to remove all extraneous cement.
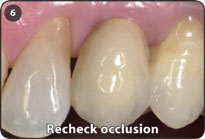
6. Recheck the occlusion after cementation.
Note: Use irrigation when preparing the abutment intra-orally to prevent heating and potential damage to the bone.
A try-in of the casting prior to the porcelain application is advised to assure a passive seating.
A knife or feathered-edge margin is employed at the most apical portion of the die. The margin need not be at the abutment’s height of contour.
Statistically, a 2.0mm diameter abutment post will move 0.1mm into the well of an implant from its initial insertion to its being definitively seated, and a 3.0mm abutment will move 0.25mm.
Keys to Success
- Choose the widest abutment to accommodate the edentulous space without encroaching upon the interdental papillae.
- 3.5mm abutments are recommended only for mandibular incisors; 4.0mm abutments are primarily used for maxillary laterals and bicuspids; 5.0mm abutments are more universal in their use; 6.5mm and 7.5mm abutments are ideally suited for molars.
- The abutment can rotate 360˚ to reach a desired position or to achieve parallelism prior to seating.
- Avoid direct handling of an abutment post, since a change of its geometry may result in a non-retentive abutment.
- Use an abutment preparation holder (260-101-390) when modifying abutments extra-orally.
- Use irrigation when preparing an abutment intra-orally.
- Do not make an impression with the emergence cuff.
- The use of retraction cord is not necessary.
- An emergence cuff can act as a means of gingival retraction.
- The casting may end with a knife or feathered edge margin anywhere along the coronal aspect of the abutment.
- Use minimal amount of cement at the cervical margin to avoid hydraulic forces which may prevent the crown from seating fully.
Page 1 | Page 2 | Page 3 | Page 4 | Page 5 | Page 6 | Page 7 | Page 8