Porcelain Fused to Metal: Non-Shouldered Abutment
Page 1 | Page 2 | Page 3 | Page 4 | Page 5 | Page 6 | Page 7 | Page 8
Temporization and Impression of an Occlusally Modified Abutment
with an Acrylic Sleeve
 |
 |
 |
 |
 |
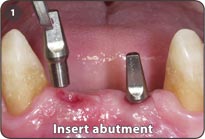
1. Insert the appropriate non-shouldered abutment. The width of the abutment is dictated by the anatomy of the interdental papillae. The abutment should support the papillae without encroaching upon them.
2. Tap the abutment in the long axis of the abutment post and implant well.
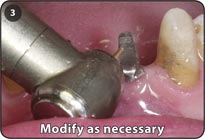
3. Evaluate the occlusal height of the abutment and trim as necessary with a sharp carbide bur and external irrigation.
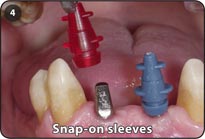
4. After the necessary modifications have been made, orientate the internal flat(s) of the appropriate non-shouldered colored acrylic impression sleeve with the external flat(s) of the abutment prior to snapping it onto the abutment.
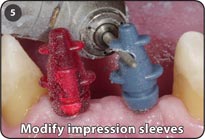
5. Trim the impression sleeve to the level of the modified abutment. Trim a second impression sleeve to the level of the modified abutment to act as a corrective coping for the modification of the laboratory abutment transfer die.
Notes: Statistically, a 2.0mm diameter abutment post will move 0.1mm into the well of an implant from its initial insertion to its being definitively seated, and a 3.0mm abutment will move 0.25mm.
Keys to Success
- If an abutment must be modified occlusally, a corrective coping must be made for the modification of the laboratory transfer die. Without the fabrication of a corrective coping the final casting will not accurately fit the modified abutment.
- If the margin must be modified chairside, it is recommended to make a direct impression of the abutment.
- It is recommended that any modifications be made by the laboratory technician for greater accuracy.
Cementation
 |
|
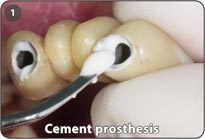
1. Cement prosthesis conventionally with only a minimal amount of any type of cement at the cervical margin.
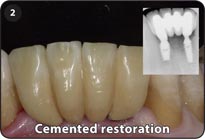
2. Cemented restoration.
Page 1 | Page 2 | Page 3 | Page 4 | Page 5 | Page 6 | Page 7 | Page 8