Porcelain Fused to Metal: Non-Shouldered Abutment
Page 1 | Page 2 | Page 3 | Page 4 | Page 5 | Page 6 | Page 7 | Page 8
Laboratory Technique: Crown Fabrication with an Acrylic Sleeve
 |
 |
 |
 |
 |
 |
 |
 |
 |
1. Orientate the external flat(s) of the colored abutment transfer die with the internal flat(s) of the correspondingly colored non-shouldered acrylic impression sleeve prior to snapping it into the impression. It is imperative that the correct abutment transfer die be used. The diameter and height of the transfer die should match the diameter and height of the abutment.
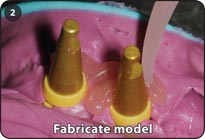
2. Pour a soft tissue or stone model.
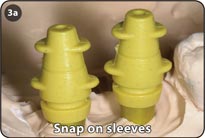
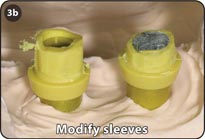
3. Snap a correspondingly colored impression sleeve or a temporization sleeve onto the colored abutment transfer die. Make any necessary adjustments to the waxing sleeve and/or abutment transfer die.
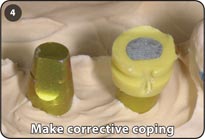
4. Make a corrective coping using an impression or temporization sleeve.
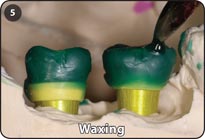
5. Incorporate the waxing sleeve into the wax pattern for the metal casting to be used intra-orally to modify the seated titanium abutment.
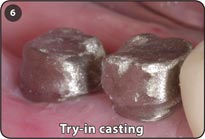
6. Try-in metal casting for a passive fit after having used a corrective coping to make any necessary modifications.
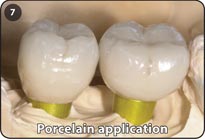
7. Apply porcelain following normal layering techniques until the crown is completed.
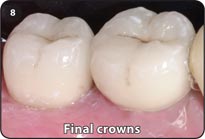
8. Final view of cemented porcelain fused to metal restoration.
Keys to Success
- It is paramount that the proper abutment transfer die height be chosen to pour the stone model since all transfer dies of the same color will snap into the impression sleeve of that color.
- The diameter and height of the transfer dies are sized to match the diameter and height of the abutments.
- Impression sleeves and temporization sleeves of the same diameter are interchangeable for laboratory purposes only.
- The temporization sleeves are more retentive than the impression sleeves.
Page 1 | Page 2 | Page 3 | Page 4 | Page 5 | Page 6 | Page 7 | Page 8