Since 1985 » Simple. Predictable. Profitable.
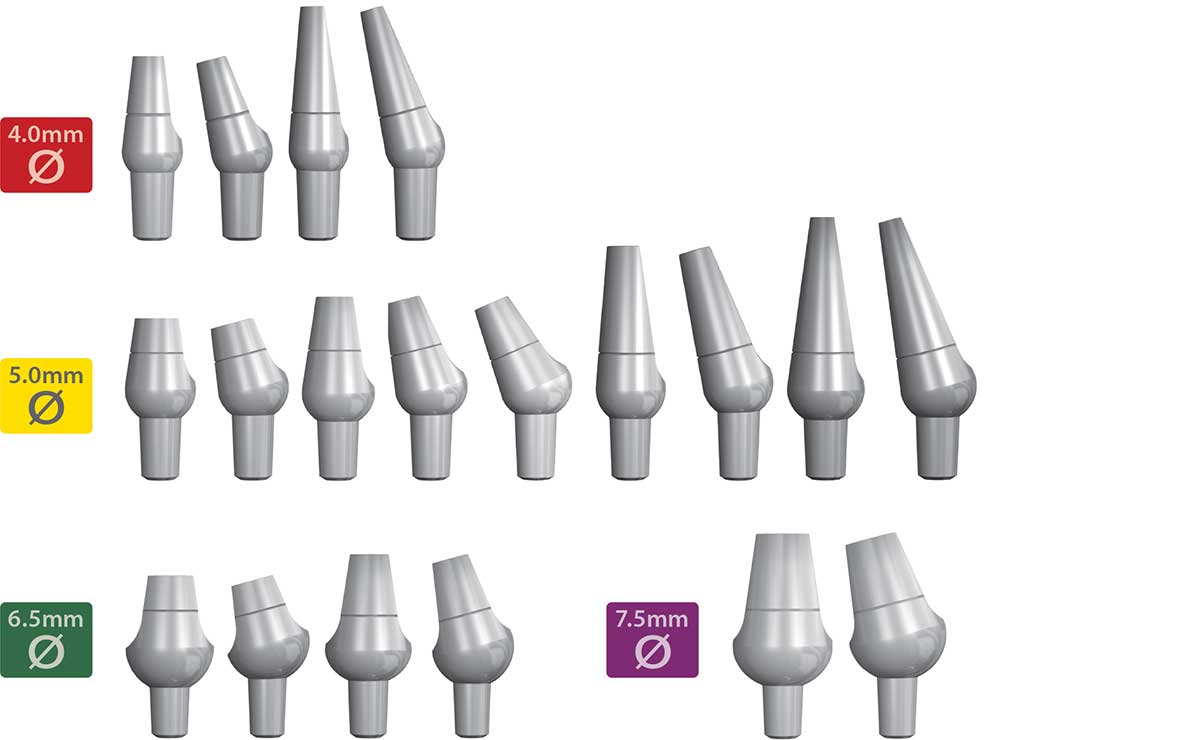
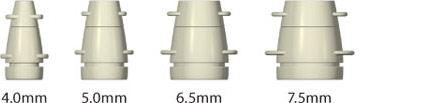
Non-Shouldered Abutments
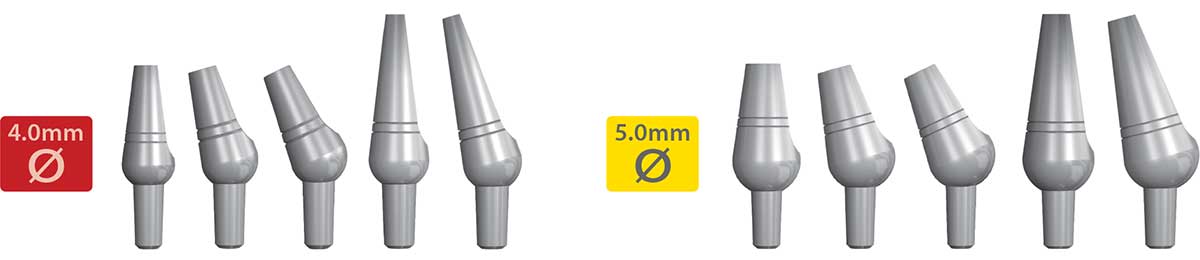
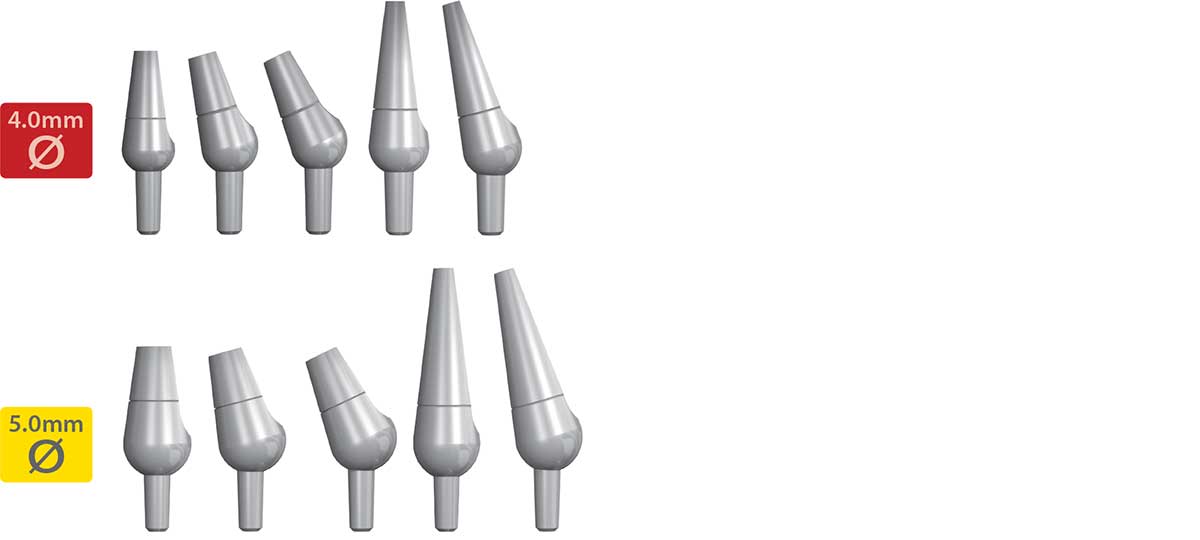
With 0°, 15°, and 25° angled abutments and over 18 different sizes to choose from, the non-shouldered abutment is one of Bicon’s most versatile. Since it is a solid abutment, it can be prepared either intra-orally or extra-orally. The new Restorative/Laboratory kits (consisting of two sleeves and a transfer die) will facilitate impression taking, temporization, wax-ups, and the fabrication of corrective copings. The impression sleeves snap definitively onto the new non-shouldered abutments and are color coded according to the diameter of the abutment: 4.0mm = red, 5.0mm = yellow, 6.5mm = green and 7.5mm = purple.
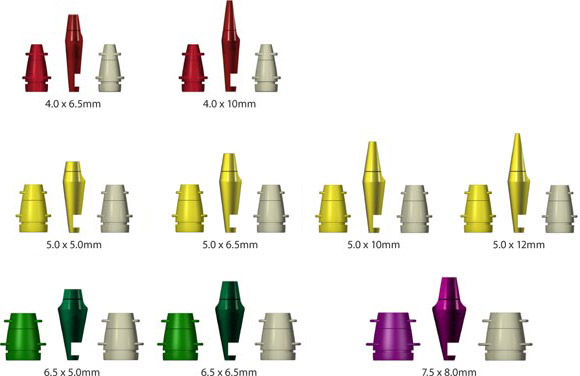
Non-Shouldered Abutments with a 3.0mm Post
| Description | Dia. | Height | Angle | Post | Part Number |
|---|---|---|---|---|---|
| 4.0 x 6.5mm 0° Abutment 3.0mm Post | 4.0mm | 6.5mm | 0° | 3.0mm | 260-340-001 |
| 4.0 x 6.5mm 15° Abutment 3.0mm Post | 4.0mm | 6.5mm | 15° | 3.0mm | 260-340-015 |
| 4.0 x 10mm 0° Abutment 3.0mm Post | 4.0mm | 10mm | 0° | 3.0mm | 260-340-101 |
| 4.0 x 10mm 15° Abutment 3.0mm Post | 4.0mm | 10mm | 15° | 3.0mm | 260-340-115 |
| 5.0 x 5.0mm 0° Abutment 3.0mm Post | 5.0mm | 5.0mm | 0° | 3.0mm | 260-350-050 |
| 5.0 x 5.0mm 15° Abutment 3.0mm Post | 5.0mm | 5.0mm | 15° | 3.0mm | 260-350-055 |
| 5.0 x 6.5mm 0° Abutment 3.0mm Post | 5.0mm | 6.5mm | 0° | 3.0mm | 260-350-001 |
| 5.0 x 6.5mm 15° Abutment 3.0mm Post | 5.0mm | 6.5mm | 15° | 3.0mm | 260-350-015 |
| 5.0 x 6.5mm 25° Abutment 3.0mm Post | 5.0mm | 6.5mm | 25° | 3.0mm | 260-350-025 |
| 5.0 x 10mm 0° Abutment 3.0mm Post | 5.0mm | 10mm | 0° | 3.0mm | 260-350-101 |
| 5.0 x 10mm 15° Abutment 3.0mm Post | 5.0mm | 10mm | 15° | 3.0mm | 260-350-115 |
| 5.0 x 12mm 0° Abutment 3.0mm Post | 5.0mm | 12mm | 0° | 3.0mm | 260-350-201 |
| 5.0 x 12mm 15° Abutment 3.0mm Post | 5.0mm | 12mm | 15° | 3.0mm | 260-350-215 |
| 6.5 x 5.0mm 0° Abutment 3.0mm Post | 6.5mm | 5.0mm | 0° | 3.0mm | 260-365-050 |
| 6.5 x 5.0mm 15° Abutment 3.0mm Post | 6.5mm | 5.0mm | 15° | 3.0mm | 260-365-055 |
| 6.5 x 6.5mm 0° Abutment 3.0mm Post | 6.5mm | 6.5mm | 0° | 3.0mm | 260-365-001 |
| 6.5 x 6.5mm 15° Abutment 3.0mm Post | 6.5mm | 6.5mm | 15° | 3.0mm | 260-365-015 |
| 7.5 x 8.0mm 0° Abutment 3.0mm Post | 7.5mm | 8.0mm | 0° | 3.0mm | 260-375-801 |
| 7.5 x 8.0mm 15° Abutment 3.0mm Post | 7.5mm | 8.0mm | 15° | 3.0mm | 260-375-815 |
Non-Shouldered Abutments with a 2.5mm Post
| Description | Dia. | Height | Angle | Post | Part Number |
|---|---|---|---|---|---|
| 4.0 x 6.5mm 0° Abutment 2.5mm Post | 4.0mm | 6.5mm | 0° | 2.5mm | 260-240-001 |
| 4.0 x 6.5mm 15° Abutment 2.5mm Post | 4.0mm | 6.5mm | 15° | 2.5mm | 260-240-015 |
| 4.0 x 6.5mm 25° Abutment 2.5mm Post | 4.0mm | 6.5mm | 25° | 2.5mm | 260-240-025 |
| 4.0 x 10mm 0° Abutment 2.5mm Post | 4.0mm | 10mm | 0° | 2.5mm | 260-240-101 |
| 4.0 x 10mm 15° Abutment 2.5mm Post | 4.0mm | 10mm | 15° | 2.5mm | 260-240-115 |
| 5.0 x 6.5mm 0° Abutment 2.5mm Post | 5.0mm | 6.5mm | 0° | 2.5mm | 260-250-001 |
| 5.0 x 6.5mm 15° Abutment 2.5mm Post | 5.0mm | 6.5mm | 15° | 2.5mm | 260-250-015 |
| 5.0 x 6.5mm 25° Abutment 2.5mm Post | 5.0mm | 6.5mm | 25° | 2.5mm | 260-250-025 |
| 5.0 x 10mm 0° Abutment 2.5mm Post | 5.0mm | 10mm | 0° | 2.5mm | 260-250-111 |
| 5.0 x 10mm 15° Abutment 2.5mm Post | 5.0mm | 10mm | 15° | 2.5mm | 260-250-115 |
Non-Shouldered Abutments with a 2.0mm Post
| Description | Dia. | Height | Angle | Post | Part Number |
|---|---|---|---|---|---|
| 4.0 x 6.5mm 0° Abutment 2.0mm Post | 4.0mm | 6.5mm | 0° | 2.0mm | 260-140-002 |
| 4.0 x 6.5mm 15° Abutment 2.0mm Post | 4.0mm | 6.5mm | 15° | 2.0mm | 260-140-015 |
| 4.0 x 6.5mm 25° Abutment 2.0mm Post | 4.0mm | 6.5mm | 25° | 2.0mm | 260-140-025 |
| 4.0 x 10mm 0° Abutment 2.0mm Post | 4.0mm | 10mm | 0° | 2.0mm | 260-140-101 |
| 4.0 x 10mm 15° Abutment 2.0mm Post | 4.0mm | 10mm | 15° | 2.0mm | 260-140-115 |
| 5.0 x 6.5mm 0° Abutment 2.0mm Post | 5.0mm | 6.5mm | 0° | 2.0mm | 260-150-001 |
| 5.0 x 6.5mm 15° Abutment 2.0mm Post | 5.0mm | 6.5mm | 15° | 2.0mm | 260-150-015 |
| 5.0 x 6.5mm 25° Abutment 2.0mm Post | 5.0mm | 6.5mm | 25° | 2.0mm | 260-150-025 |
| 5.0 x 12mm 0° Abutment 2.0mm Post | 5.0mm | 12mm | 0° | 2.0mm | 260-150-201 |
| 5.0 x 12mm 15° Abutment 2.0mm Post | 5.0mm | 12mm | 15° | 2.0mm | 260-150-215 |
Non-Shouldered Abutment Considerations
- The abutment can be rotated 360˚ to reach a desired position or to achieve parallelism prior to being seated.
- The 4.0mm abutments are primarily used for maxillary laterals and bicuspids; 5.0mm abutments are more universal in their use; 6.5mm and 7.5mm abutments are ideally suited for molars.
- The diameter of each Emergence Cuff corresponds to the diameter of a non-shouldered abutment.
- Do not make an impression with the emergence cuff.
- Choose the widest abutment and sleeve (see below) that will support the interproximal papillae without encroaching upon them.
Restorative/Laboratory Kits for Non-Shouldered Abutments*
| Description | Dia. | Height | Part Number |
|---|---|---|---|
| 4.0 x 6.5mm Non-Shouldered Restorative/Laboratory Kit | 4.0mm | 6.5mm | 260-140-465 |
| 4.0 x 10mm Non-Shouldered Restorative/Laboratory Kit | 4.0mm | 10mm | 260-140-410 |
| 5.0 x 5.0mm Non-Shouldered Restorative/Laboratory Kit | 5.0mm | 5.0mm | 260-150-450 |
| 5.0 x 6.5mm Non-Shouldered Restorative/Laboratory Kit | 5.0mm | 6.5mm | 260-150-465 |
| 5.0 x 10mm Non-Shouldered Restorative/Laboratory Kit | 5.0mm | 10mm | 260-150-410 |
| 5.0 x 12mm Non-Shouldered Restorative/Laboratory Kit | 5.0mm | 12mm | 260-150-412 |
| 6.5 x 5.0mm Non-Shouldered Restorative/Laboratory Kit | 6.5mm | 5.0mm | 260-165-450 |
| 6.5 x 6.5mm Non-Shouldered Restorative/Laboratory Kit | 6.5mm | 6.5mm | 260-165-465 |
| 7.5 x 8.0mm Non-Shouldered Restorative/Laboratory Kit | 7.5mm | 8.0mm | 260-175-480 |
*Each kit contains (1) Transfer Die, (1) Impression/Waxing Sleeve, and (1) Temporization Sleeve.
Temporization Sleeves for Non-Shouldered Abutments
| Description | Dia. | Part Number |
|---|---|---|
| 4.0mm Non-Shouldered Temporization Sleeve (2) | 4.0mm | 260-140-165 |
| 5.0mm Non-Shouldered Temporization Sleeve (2) | 5.0mm | 260-150-165 |
| 6.5mm Non-Shouldered Temporization Sleeve (2) | 6.5mm | 260-165-165 |
| 7.5mm Non-Shouldered Temporization Sleeve (2) | 7.5mm | 260-175-165 |
Non-Shouldered Prosthetic Components Considerations
- The impression sleeves and transfer dies are color coded according to the corresponding diameter of the non-shouldered abutment:
4.0mm = red, 5.0mm = yellow, 6.5mm = green, and 7.5mm = purple. - The sleeves may be used for impression making, temporization, corrective copings, and/or as waxing sleeves.
- The temporization sleeves may be used in lieu of the emergence cuffs.
- Always confirm the complete seating of snap-on sleeves with either the non-shouldered abutment or colored abutment transfer die.
- It is paramount that the proper abutment transfer die height be chosen for pouring of a stone model, since all transfer dies of the same color will snap into an impression sleeve of that color.
- The diameter and height of the transfer dies are sized to match the diameter and height of a corresponding non-shouldered abutment.
- Although possible, avoid making an impression using the tooth colored temporization sleeves, since they are not color coded with their corresponding transfer dies and they are more retentive.
- Sleeves may be easily modified to suit a particular clinical need.
- Current versions of the non-shouldered abutment have a groove approximately 3.0mm above its height of contour providing retention for the new snap-on impression and temporization sleeves.
- If a sleeve is used as a waxing sleeve, the internal snap ring should be removed with a bur.
Emergence Cuffs for Non-Shouldered Abutments
| Description | Dia. | Part Number |
|---|---|---|
| 4.0mm Emergence Cuff (4) | 4.0mm | 260-140-010 |
| 5.0mm Emergence Cuff (4) | 5.0mm | 260-150-010 |
| 6.5mm Emergence Cuff (4) | 6.5mm | 260-165-065 |
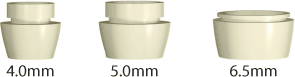
Emergence Cuff Considerations
- The diameter of each emergence cuff corresponds to the diameter of a non-shouldered abutment.
- Do not make an impression with an emergence cuff.
- If you prefer to make an impression of a non-shouldered abutment with a plastic sleeve, please refer to above, Restorative/Laboratory Kits for Non-Shouldered Abutments, section.
- The temporization sleeves may be used in lieu of the emergence cuffs.