Porcelain Fused to Metal: Non-Shouldered Abutment
Page 1 | Page 2 | Page 3 | Page 4 | Page5 | Page 6 | Page 7 | Page 8
Temporization with an Acrylic Sleeve
 |
 |
 |
 |
 |
 |
 |
 |
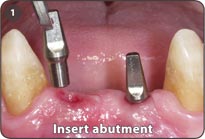
1. Insert the appropriate non-shouldered abutment. The width of the abutment is dictated by the anatomy of the interdental papillae. The abutment should support the papillae without encroaching upon them.
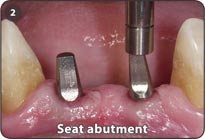
2. Tap the abutment in the long axis of the abutment post and implant well.
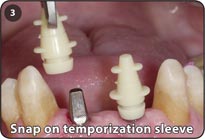
3. Orientate the internal flat(s) of the appropriate non-shouldered acrylic temporization sleeve with the external flat(s) of the abutment prior to snapping it onto the abutment.
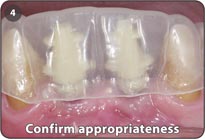
4. Confirm the appropriateness of the non-shouldered acrylic temporization sleeve with a vacuum formed template. Adjust the acrylic sleeve as necessary.
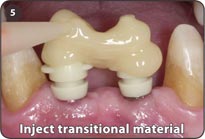
5. Inject transitional crown material around the non-shouldered acrylic temporization sleeve.
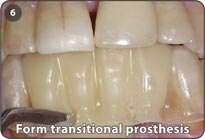
6. Inject transitional material into the vacuum-formed template prior to re-inserting it over the non-shouldered acrylic temporization sleeve to form a transitional prosthesis.
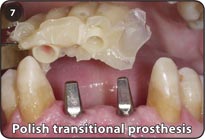
7. Remove transitional prosathesis for polishing.
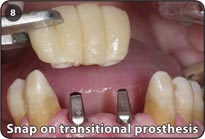
8. Snap the completed transitional prosthesis onto the non-shouldered abutment to facilitate the formation and preservation of an aesthetic soft tissue emergence profile.
Notes: Statistically, a 2.0mm diameter abutment post will move 0.1mm into the well of an implant from its initial insertion to its being definitively seated, and a 3.0mm abutment will move 0.25mm.
Keys to Success
- Choose the widest abutment and sleeve that will support the interdental papillae without encroaching upon them.
- Always confirm the complete seating of a snap-on acrylic sleeve for both the non-shouldered abutment and colored abutment transfer die.
- Avoid the use of excessive transitional material intra-orally, since it is usually easier to add to a void than it is to remove excess material.
Page 1 | Page 2 | Page 3 | Page 4 | Page5 | Page 6 | Page 7 | Page 8